小明只会一点点python,利用python爬虫,之前想到做一个python接口,让爬虫用api形式更为方便。
所以本文PHP大佬请勿喷,本人不会PHP哈!
文章目录
前言
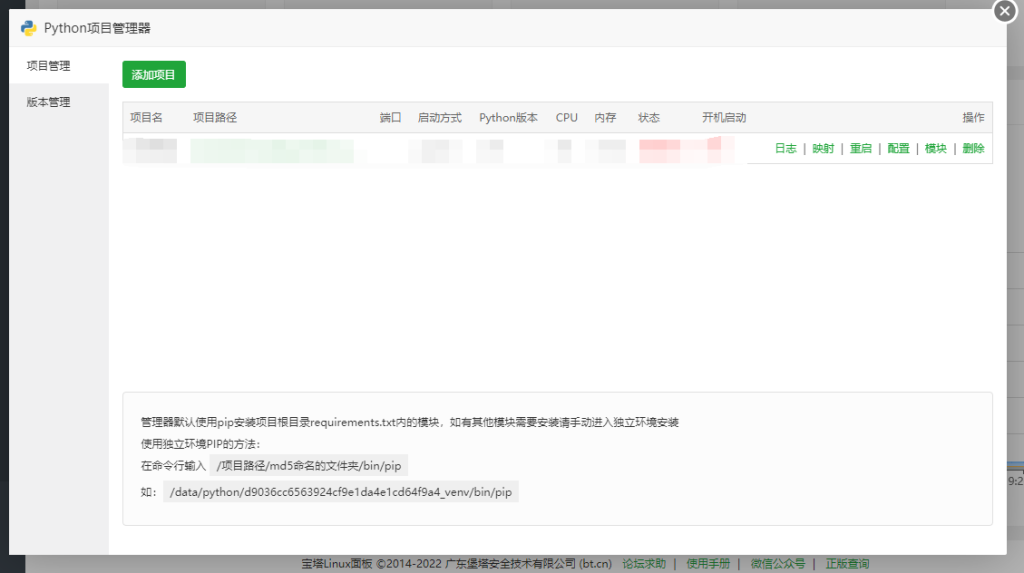
可之前都是看网上介绍说 python + flask 完成前端及接口,然后就用了。但是呢,一直都是用着宝塔,宝塔里面的 Python项目管理器2.0 。这就方便我这种啥也不会的呀,这样配置有手就行...


可是发现映射去前端直接占用一个域名了,一个接口一个域名不值得阿,虽然肯定是有办法的,也没想太多,还是太麻烦了。
近几日我又去搜索了一些python和PHP的文章,可是它们俩是两个语言,网上资料不是很全面,几乎没有我想要的(或者是我看不懂)。其实我就是想PHP传参数让python跑,然后结果再渲染出来。看起来不是很理想的想法。
参考了很多文章,我记录下来了三篇我比较看得懂的(文章底部)。
开始分享经验.
Python
首先主要用到python自带的库:sys
import sys这作为一个变量吧,就是PHP传数据关键就在这了
然后python代码正常写,想作为参数的值就用sys
import sys
import requests
url = sys.argv[1]
resp = requests.get(url, headers=headers)
print (resp)
看下面解释只能用到最后一个print的内容,所以可以整合一个变量输出。
因为我api输出是需要json格式的,所以转化一下(data_a是需要输出的变量):
data = json.dumps(data_a, ensure_ascii=False) #处理了Unicode编码的问题,使中文能够在json中显示
print(data)
PHP
接着就来到了PHP部分
PHP调用python的两种函数
php调用python脚本
起初是为了实现一个小需求,想要在JQuery执行的AJAX异步请求时在服务器端调用执行Python脚本。而Windows服务器端部署的WEB环境是Apache+PHP,在AJAX异步请求时根本不能直接调用Python脚本。
因为web开发语言是php而非Python的Django和Flask等开发框架。AJAX是可以调用执行服务器端的脚本文件,但它的本质仍是HTTP的请求。
所以就只能在HTTP请求中想办法调用Python脚本,也就在PHP程序中调用执行python脚本。
这里就要用到PHP的内置函数exec() 和system() ;
PHP的exec() 和system() 函数区别:
(1)system()
原型:string system (string command [, int return_var])
system()函数很其它语言中的差不多,它执行给定的命令,输出和返回结果。
(2)exec()
原型:string exec (string command [, string array [, int return_var]])
exec ()函数与system()类似,也执行给定的命令,但不输出结果,而是返回结果的最后一行。
可以看出两个函数的区别就是PHP在调用执行外部命令后,system()函数将执行的结果输出并返回给PHP程序。而 exec() 函数在调用执行外部命令后不会将结果输出,只是返回结果。
看了之后呢我也是用了exec()这个函数。
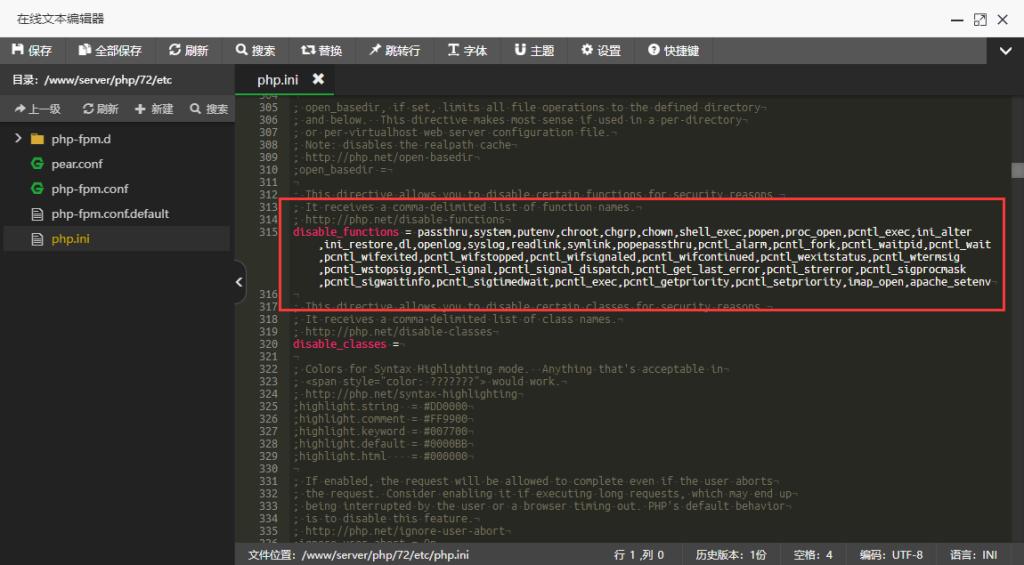
---首先PHP是将这个函数禁用的,如果没有报错就省略这步---
找到Web对应使用的PHP版本,找到php.ini文件,大概是在:/www/server/php/72/etc 里(72是PHP版本号-PHP7.2)在这个文件的315行左右找到exec删掉即可。

具体用法:
<?php
header('Content-type:text/json');
$url = @$_GET['url'];
$output=exec("python index.py $url");
echo $output;
?>
因为我这输出的是Api接口,就在header里加了json格式。
$url是一个和python对接的函数变量(python代码里的sys库)
exec("python 文件名.py $url") $url是在这后面接上api后面的参数(需和前面一致,多个参数在$url后面加空格后加第二个参数)。
大概就是这样,比如结合之前的文章《利用python爬虫快手用户信息》来实操一下。
代码展示:
Python代码部分
# -*- coding: utf-8 -*-
# @Time    : 2022/2/5 12:59
# @Author  : AooMing
# @File    : test.py

import requests
import json
import sys
headers={
    'User-Agent':'Mozilla/5.0 (Windows NT 10.0; Win64; x64) AppleWebKit/537.36 (KHTML, like Gecko) Chrome/87.0.4280.141 Safari/537.36',
    'cookie': '',
    'content-type': 'application/json',
}
searchapi = 'https://www.kuaishou.com/search/author?searchKey='
search_id = sys.argv[1]
url = 'https://www.kuaishou.com/graphql'
payload = {"operationName": "graphqlSearchUser",
           "variables": {"keyword":search_id},
           "query": "query graphqlSearchUser($keyword: String, $pcursor: String, $searchSessionId: String) {\n  visionSearchUser(keyword: $keyword, pcursor: $pcursor, searchSessionId: $searchSessionId) {\n    result\n    users {\n      fansCount\n      photoCount\n      isFollowing\n      user_id\n      headurl\n      user_text\n      user_name\n      verified\n      verifiedDetail {\n        description\n        iconType\n        newVerified\n        musicCompany\n        type\n        __typename\n      }\n      __typename\n    }\n    searchSessionId\n    pcursor\n    __typename\n  }\n}\n"
}
payload_data = json.dumps(payload)
resp = requests.post(url, data=payload_data, headers=headers).json()
#print(resp)
uid = resp['data']['visionSearchUser']['users'][0]['user_id']
name = resp['data']['visionSearchUser']['users'][0]['user_name']
user_data = resp['data']['visionSearchUser']['users'][0]
a = str(user_data['verified'])
def verified():
    if a == 'True':
        return (user_data['verifiedDetail']['description'])
    else:
        return ('无')
def user_text():
    user_text = user_data['user_text']
    if user_text == '':
        return '暂无签名'
    else:
        return user_text

gourl = 'https://www.kuaishou.com/profile/' + uid
payload_2 = {"operationName":"visionProfile",
             "variables":{"userId":uid},
             "query":"query visionProfile($userId: String) {\n  visionProfile(userId: $userId) {\n    result\n    hostName\n    userProfile {\n      ownerCount {\n        fan\n        photo\n        follow\n        photo_public\n        __typename\n      }\n      profile {\n        gender\n        user_name\n        user_id\n        headurl\n        user_text\n        user_profile_bg_url\n        __typename\n      }\n      isFollowing\n      __typename\n    }\n    __typename\n  }\n}\n"
    }
payload_2_data = json.dumps(payload_2)
resp_2 = requests.post(url, data=payload_2_data, headers=headers).json()
#print(resp_2)
userProfile = resp_2['data']['visionProfile']['userProfile']

def gender():
    gender = userProfile['profile']['gender']
    if gender == 'M':
        return ('男')
    if gender == 'F':
        return ('女')
data_a = {
    "用户ID": uid,
    "昵称": name,
    "性别": gender(),
    "签名": user_text(),
    "作品": userProfile['ownerCount']['photo_public'],
    "粉丝": userProfile['ownerCount']['fan'],
    "关注": userProfile['ownerCount']['follow'],
    "认证": verified(),
    "头像": userProfile['profile']['headurl'],
    'api': 'XiaoMing'
}
data = json.dumps(data_a, ensure_ascii=False)
print(data)
PHP代码部分
<?php
header('Content-type:text/json');
$id = @$_GET['id'];
$output=exec("python test.py $id");
echo $output;
?>
比如我把文件放在了网站根目录的 /api/ksuser/ 下面
效果如下:

参考文献